
How to Add and Schedule an Announcement
Announcement feature lets you easily share important updates with your team. Whether posting immediately or scheduling ahead, this guide will show you how to add and manage announcements step by step.
1. Log in to your portal (e.g., yourcompany.instaff.org) as an Administrator.
2. From the left-hand menu, go to Admin, then select Announcement.
Fill in the details:
Title – Enter the title of your announcement.
Show Until – Specify the date until which the announcement should be displayed.
Departments That Can View – Select the department(s) that should have access to the announcement.
Announcement Text – Enter the details or content of your announcement.
Select File to Upload – Upload any file(s) you wish to include with the announcement.
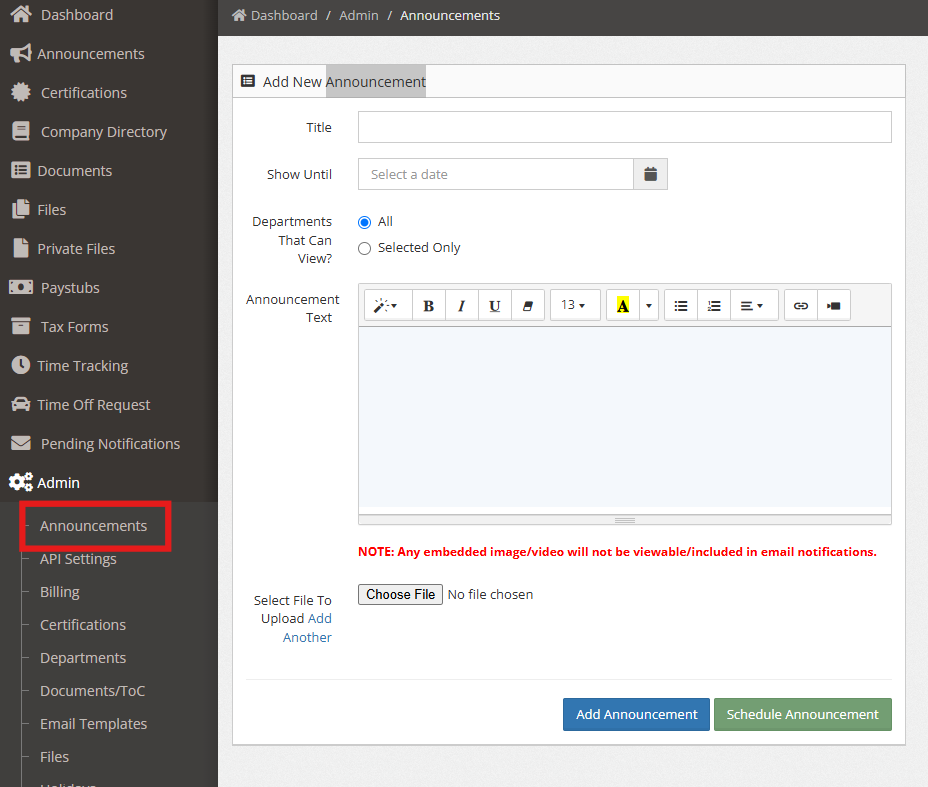
3. Click Add Announcement. Once completed, the announcement will appear on the right side of the screen.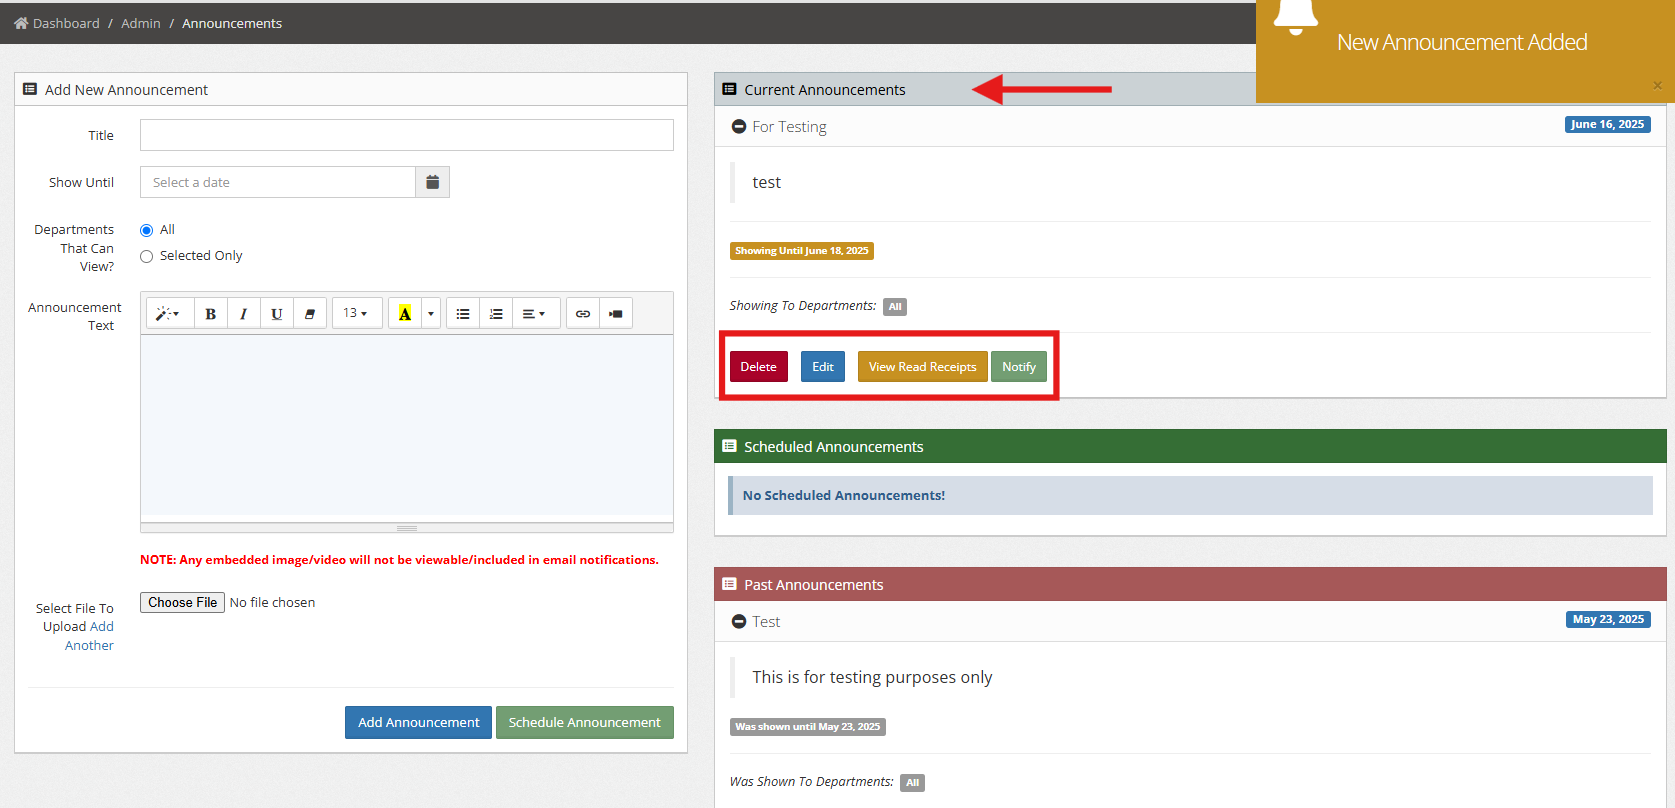
Note: The highlighted boxes provide options for managing your announcement. Select the appropriate option based on the action you want to perform.
4. Now, if you want to Schedule an Announcement, Once you click ‘Schedule Announcement’
A pop-up window will appear where you can enter the specific date on which the announcement should be displayed.
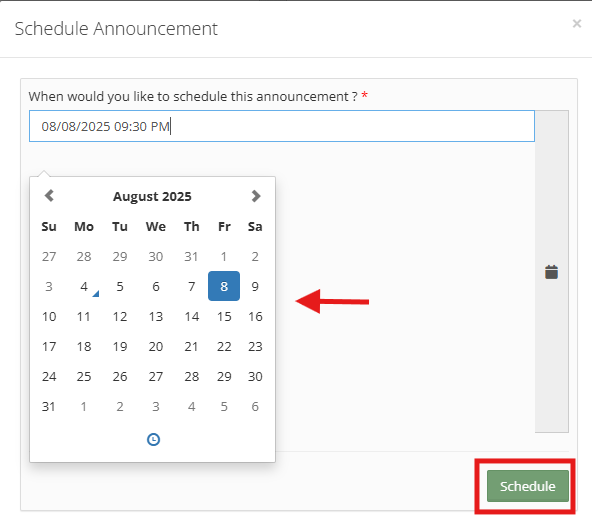
5. After you click on ‘Schedule’, the following screen should appear.
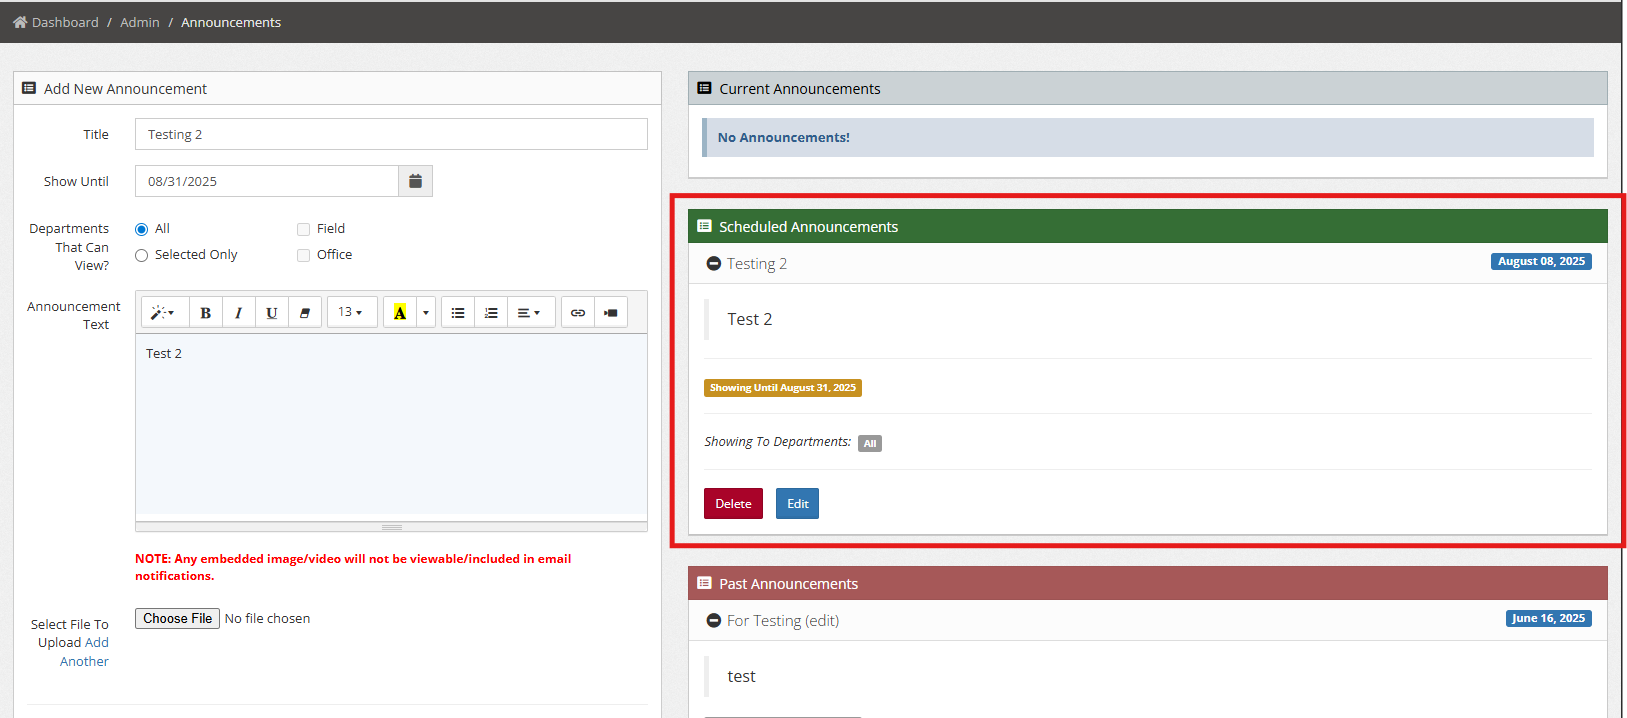
You can also check: