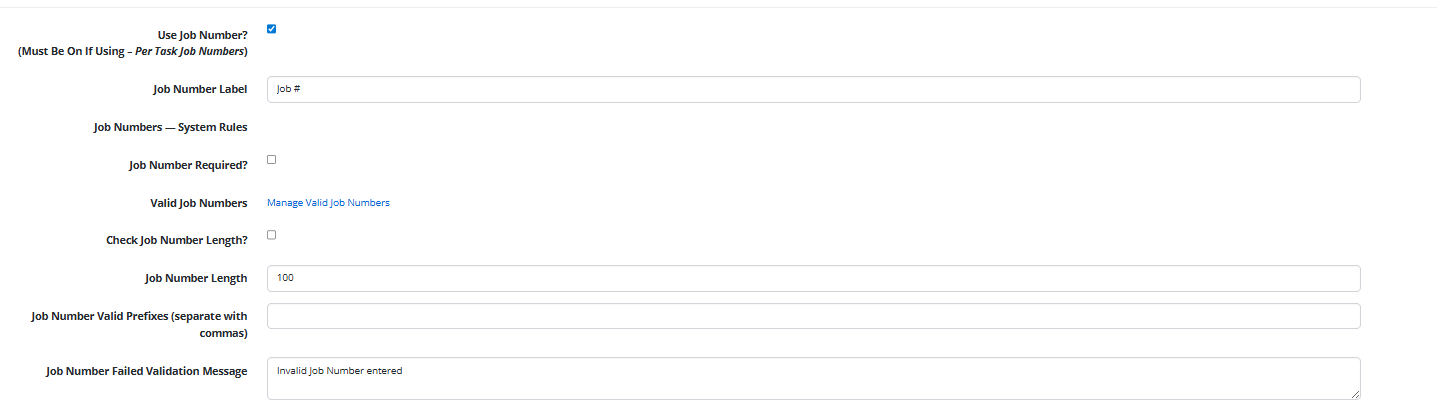
Setting up Job Numbers
A Job Number is a unique ID that links time entries to specific tasks or projects, ensuring accurate tracking, reporting, and billing. Enabling this field allows employees to enter or select the corresponding job number for their time entries.
Here’s how to setup your Job Numbers:
1. Login as Admin user.
2. Go to Admin > Time Tracking > Settings > General Settings
3. Proceed to Job Numbers – System Rules then opt in to Job Number Required
4. To customize the Job Number label name, enter your preferred label in the Job Number Label field.
5. From Job Numbers – System Rules:
a. Job Number Required
Select this setting to make the job number field required.
b. Valid Job Numbers
Click on the Manage Valid Job Numbers link to add valid job numbers.
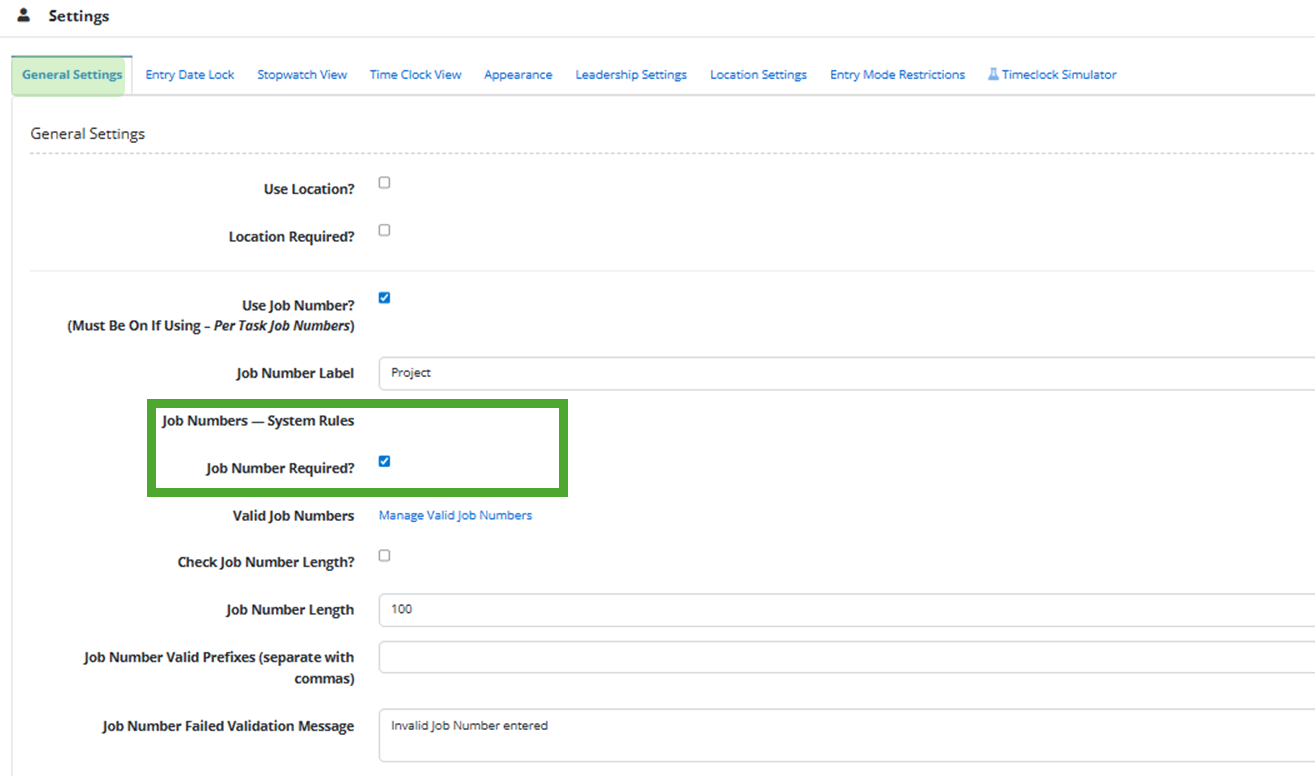
c. Job Number Length
The valid length of a job number to be entered by an employee. This is applicable if Valid Job Numbers are not configured or if you opt to use a free-text form field.
d. Job Number Valid Prefixes(separate with commas)
You can define valid prefixes for job numbers, and if multiple prefixes are to be entered, separate them by commas.
For example, you might use prefixes like “HR,” “ENG,” or “MKT” for different departments, and if you’re entering multiple valid prefixes, you should separate them with commas – HR, ENG, MKT
This is also applicable if Valid Job Numbers are not configured or if you opt to use a free-text form field.
e. Job Number Failed Validation Message
You can also customize your error message when an employee enters an invalid job number.